Showing posts with label tutorial. Show all posts

Thursday, May 17, 2012

STRING STARS

Requested and granted ... as promised~

STRING STARS

I'm not a photographer so please be kind if the photos aren't good.  Here's PART of what we're making ...

I used THANGLES (1.75") when I started these because I started 3 or 4 years ago and I needed to showcase the product for the quilt shop.  Because I started this way, I'm continuing this way.  BUT - what you need are 1/2 square triangles that measure (UNFINISHED = 2 1/4")

If you're using Thangles - follow the instructions on the package ... it's pretty simple - 2 strips of fabric (mine happen to already be cut at 2 1/2" so that's what I used) and one Thangles paper. You need one light fabric and one dark.


Place the fabric strips right sides together (RST) with a Thangles on top.  I put in a couple of pins to hold it.  Sew on ALL the dotted lines.  You certainly can get a couple of sets together and chain piece - you'll get more done, quicker! Remember ... keep it scrappy.
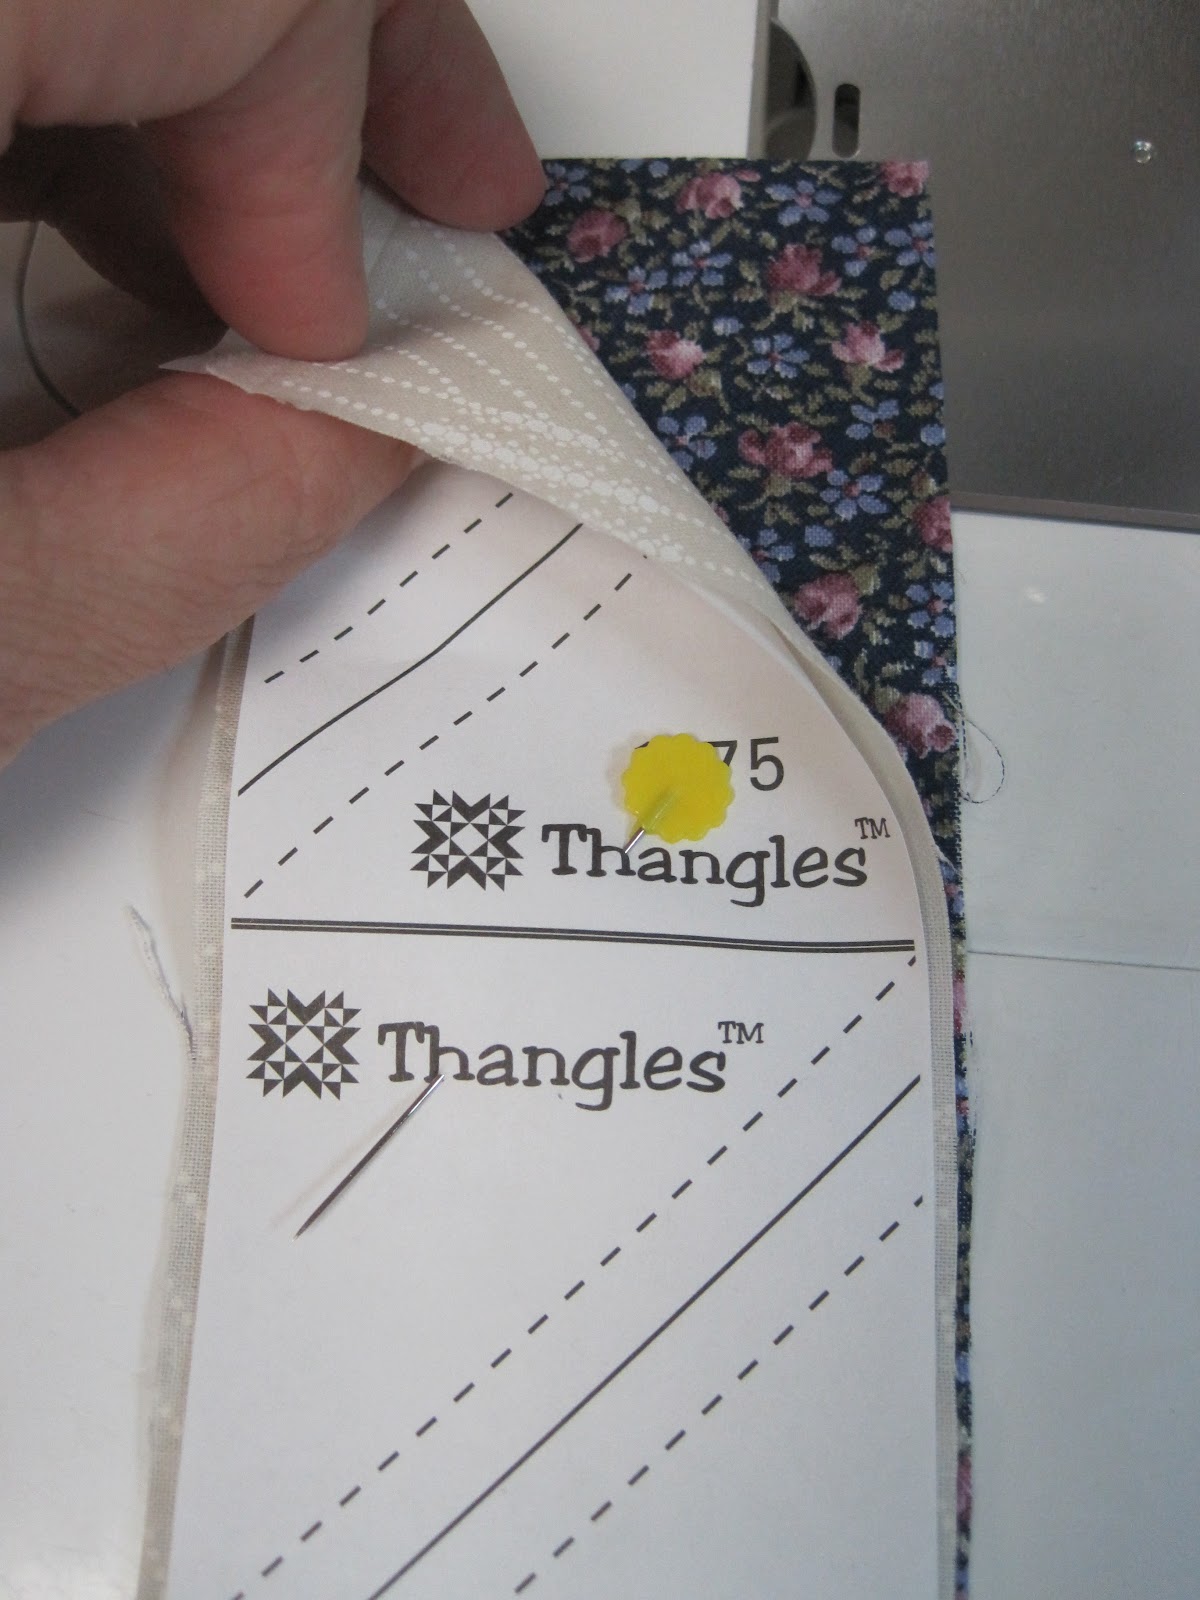
After all the dotted lines are sewn, cut apart on the SOLID lines.


When working with little triangles, I like to press the seams OPEN. Here you go - a perfect 1/2 square triangle that measures 2 1/4" x 2 1/4".  You need a lot! And you need a lot of light and dark 2 1/4" x 2 1/4" SQUARES.
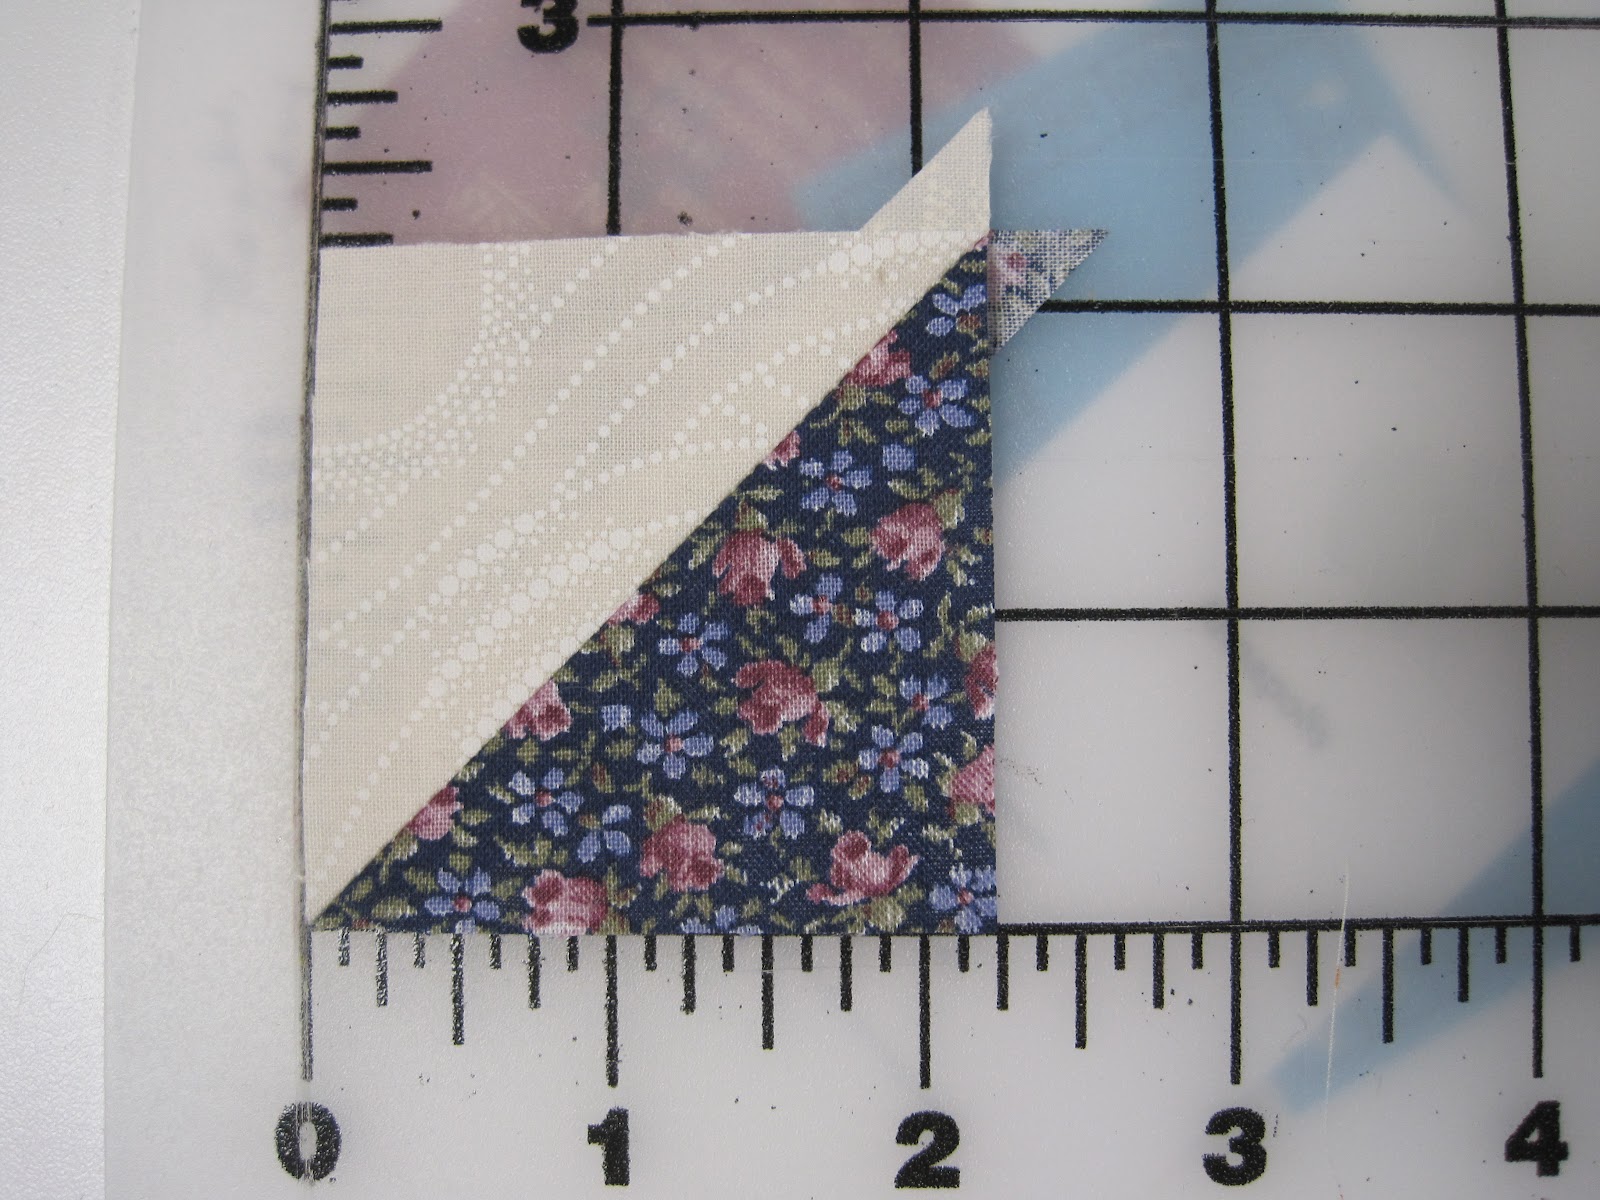

Lay out and then sew together the pieces to form a block that is 1/2 light and 1/2 dark.  It should meaure 5 1/2" x 5 1/2".


The 2nd block is a string block.  I piece these on a tear-away foundation.  I use old phone book pages.  I NEVER use the phone book to look up something - I've got a SmartPhone and iPad and a husband for that.

Cut the pages to 6" (mine were actually 6 1/2" - but that was a bit too big).


These are going to be either ALL light or ALL dark strips.  Strings = scrappy strips less than 2 1/2" wide.

Lay the first string RIGHT SIDE UP, corner to corner on the foundation.  Lay the next on RST, stitch, flip and press.  I shorten up the stitch length a bit - makes tearing off the paper easier on the stitches.


Continue to stitch strings to either side of the original one, flipping and pressing as you go.  The strings can be shorter as you go.  The goal - competely cover the foundation.


Here's what it looks like all sewn ...


This is what it looks like from the back ...


Now trim it to 5 1/2" x 5 1/2" and it's done! You can see that I didn't even need that last string.  That's because my paper was a little big but I'd rather be too big than too small.


The whole quilt is made up of these 3 blocks ...


You will need a "dark block with light star points"


You will need a "light block with dark star points"


The blocks should meaure 20 1/2".  How many you make depends on how big you want your quilt.  I think I'm going with 25 blocks and no border. Or maybe a little border. I won't have to make that decision for awhile ... I got a lot of blocks to make first.

Tuesday, August 24, 2010

BACK PROBLEMS

No ... not a physical ailment. Anyone who has ever done much quilting with a machine on a frame ... long-arm, short-arm, mid-arm ... it matters not ... you've probably had this moment. That final roll, that final pass - HURRAY - not so fast.

What's this? The backing is shorter than the quilt top? How can this be? Measure, measure, measure and ... oh no - the backing is shorter than the quilt top.
I recently got an evening phone call from my friend Starlyn who had this happen to her ... what to do? I talked her through a solution, gestures included (but we were on the phone so only the Cute Husband really understood the hand signals). I did tell her that I'd never actually tried this before.
I certainly did NOT expect to be trying it out 5 days later ... but it did work! Cut a chunk of fabric that you know is big enough in length and width for this project. Fold the quilt top and batting up out of way. Lay the new backing piece (right sides together) with the original backing still pinned to the leader. Pin the new piece to the leader, keeping the original one there too. This is being added from the underside. You'll have to pin the other edge up to the quilt to keep the whole thing neat and tidy. Then run a stitching line across, close to the leader/pins. See the stitching? I unpinned the other edge so you could see it.

Take out all the pins on the backing fabrics and repin the new backing edge. The seam allowance will be there, just finger press it down. Smooth the batting and top back into place and keep on quilting.
The frustrating part of all this was that I was only 1.5" short. I could have trimmed the border shorter and it would have fixed the problem but I didn't want a smaller border. I had already quilted some really cool spider webs in the top border and wanted the same on the bottom.
The quilt top? I'll show that off as soon as it gets a binding. Later today? tomorrow? soon - I promise!


Tuesday, March 9, 2010

SCALLOP-EDGE

Yesterday was not a quilting day but it was a sewing day. I made a nightgown for someone's birthday. Mom - if you're reading this, act surprised! I wanted to add a little something to the yoke edges but it had to be soft, wash well and still hold up and look sort of nice ... it is a nightgown so no scratchy lace and I had no ric-rac. This is not a tutorial on nightgowns but it is about a finished, embellished edging.
So - here's what I did ... sorry - no pictures of the prep work, I didn't think about a blog post until I actually started sewing.
1. Cut some bias strips (1.5" wide x whatever length you've got - mine were about 15" to start and got shorter, which is NO problem.) Sew the strips together into one really long strip ... make it as long as you need. Press the seams open and fold and press with the raw edges together the entire length of the strip.
2. Machine adjustments ... you'll be using the blind hem stitch - the one that goes straight for a few stitches then swings out for one zigzag, then goes straight again. On my Bernina it's Stitch #9. Make your stitch width as wide as you can and the lenth about 3. You might want to play a little and see how it looks before you commit.
You also need to tighten your tension (a lot). My machine goes 0 -10 and I used a 9.

Now you're ready to sew. Place the fabric strip with the fold to the right. You want the right "swing" of the zigzag to go just off the fabric. The straight stitches will be on the left. My finger is there JUST for contrast ... do NOT sew with your finger in the way!


Here's what the strip will look like after you've sew the length of it. The tight tension is what makes the little scallop along the edge.


Because it's cut on the bias, it can easily be sewn around a curve ... like a neckline or an armhole. Remember to PRESS!


If the garment is not lined or faced, you have to "clean finish" the edge. I use a serger but you can simply do a close zigzag stitch.


Then press, turning the raw edge under.


Now you'll top stitch. This will keep the raw edge from folding up and showing and generally makes for a nice finish.


Here's what it looks like what it's done ...


REALLY simple nightgown pattern, with a pretty edging. What do you think?