Requested and granted ... as promised~
STRING STARS
I'm not a photographer so please be kind if the photos aren't good. Here's PART of what we're making ...

I used THANGLES (1.75") when I started these because I started 3 or 4 years ago and I needed to showcase the product for the quilt shop. Because I started this way, I'm continuing this way. BUT - what you need are 1/2 square triangles that measure (UNFINISHED = 2 1/4")
If you're using Thangles - follow the instructions on the package ... it's pretty simple - 2 strips of fabric (mine happen to already be cut at 2 1/2" so that's what I used) and one Thangles paper. You need one light fabric and one dark.

Place the fabric strips right sides together (RST) with a Thangles on top. I put in a couple of pins to hold it. Sew on ALL the dotted lines. You certainly can get a couple of sets together and chain piece - you'll get more done, quicker! Remember ... keep it scrappy.
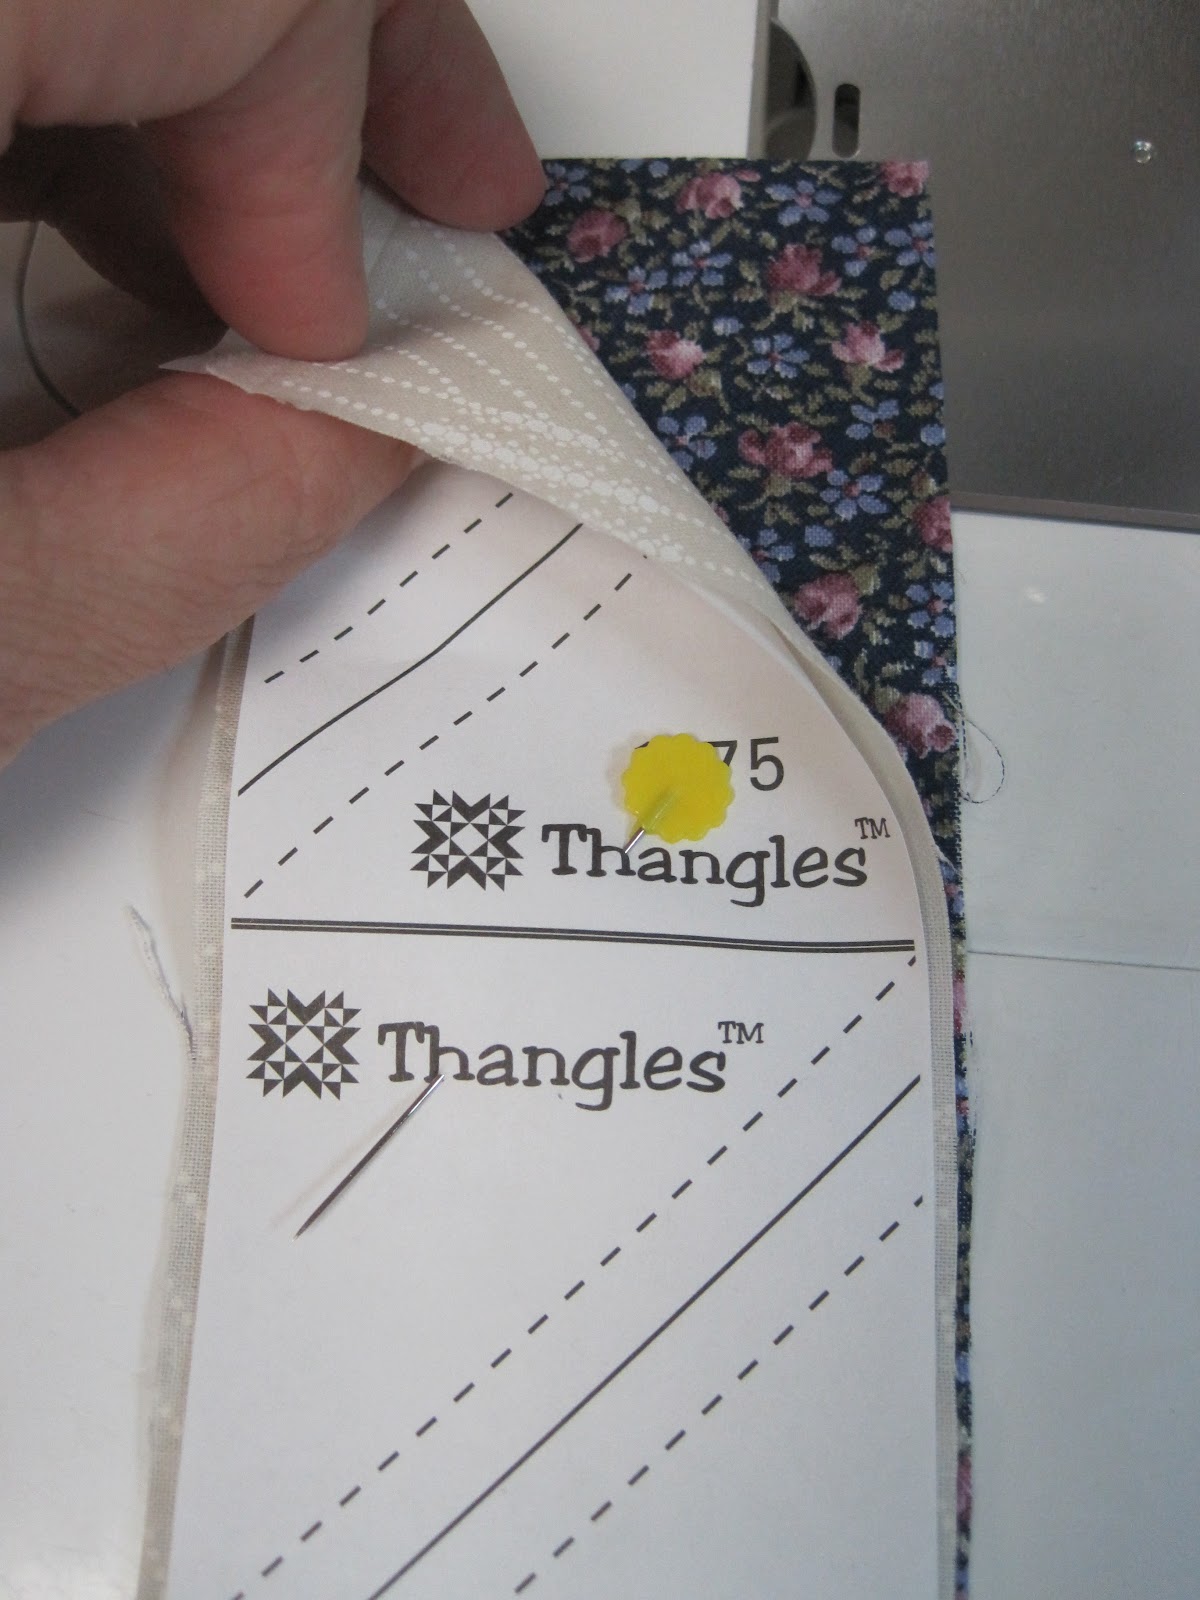
After all the dotted lines are sewn, cut apart on the SOLID lines.

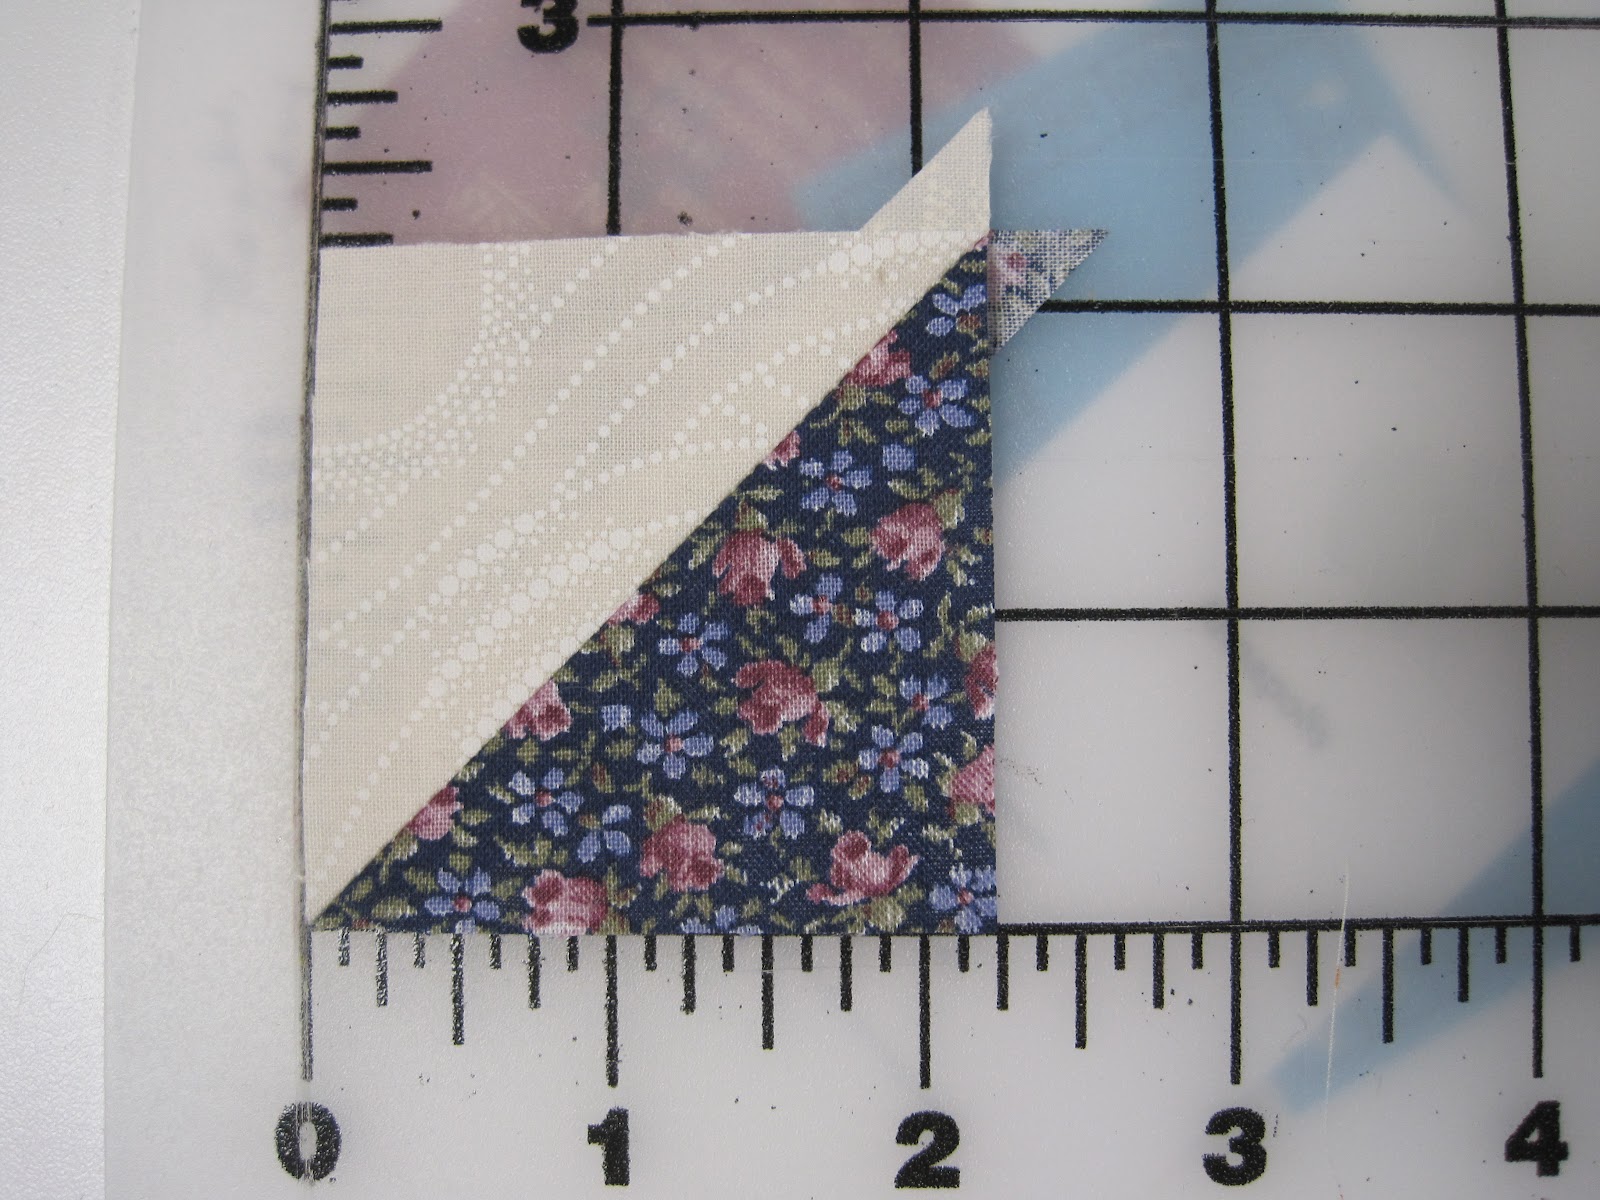
When working with little triangles, I like to press the seams OPEN. Here you go - a perfect 1/2 square triangle that measures 2 1/4" x 2 1/4". You need a lot! And you need a lot of light and dark 2 1/4" x 2 1/4" SQUARES.
Lay out and then sew together the pieces to form a block that is 1/2 light and 1/2 dark. It should meaure 5 1/2" x 5 1/2".

The 2nd block is a string block. I piece these on a tear-away foundation. I use old phone book pages. I NEVER use the phone book to look up something - I've got a SmartPhone and iPad and a husband for that.
Cut the pages to 6" (mine were actually 6 1/2" - but that was a bit too big).

These are going to be either ALL light or ALL dark strips. Strings = scrappy strips less than 2 1/2" wide.
Lay the first string RIGHT SIDE UP, corner to corner on the foundation. Lay the next on RST, stitch, flip and press. I shorten up the stitch length a bit - makes tearing off the paper easier on the stitches.

Continue to stitch strings to either side of the original one, flipping and pressing as you go. The strings can be shorter as you go. The goal - competely cover the foundation.

Here's what it looks like all sewn ...

This is what it looks like from the back ...

Now trim it to 5 1/2" x 5 1/2" and it's done! You can see that I didn't even need that last string. That's because my paper was a little big but I'd rather be too big than too small.

The whole quilt is made up of these 3 blocks ...

You will need a "dark block with light star points"

You will need a "light block with dark star points"

The blocks should meaure 20 1/2". How many you make depends on how big you want your quilt. I think I'm going with 25 blocks and no border. Or maybe a little border. I won't have to make that decision for awhile ... I got a lot of blocks to make first.
1 comment:
Wonderful!!! What a great tutorial. Can't wait to start this.
Post a Comment